icon-account icon-glass
$9 Flat Rate Shipping | Free shipping for domestic orders $75+

Recipes

Asha's Smoky Baechu Kimchi

Recipe By: Asha Loupy

Makes: 2 quarts

Asha's Quick Smoky Kimchi
Photo by:  

Melati Citrawireja

I have to admit, I am not an avid fermenter. When developing this recipe, I knew I wanted to achieve a mouthwateringly funky, smoky, chilli-forward kimchi with a generous amount of heat, but not so much that it would overwhelm the beauty of the Napa cabbage. To help get me there, I went on a kimchi deep dive into both traditional and quick recipes across the internet (all my references are listed below) and learned from many kimchi experts all the tips and tricks to making kimchi at home with no more than a large bowl, a saucepan and a massive 2-quart jar. Now, I'll never be without homemade kimchi in my fridge — and, I couldn't be more delighted!

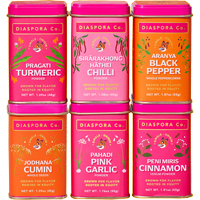
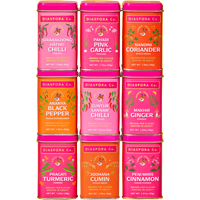
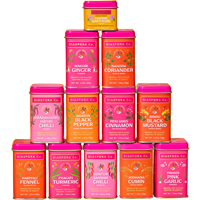
After testing several rounds of kimchi with our pre-ground chillies, I found that starting with whole chillies is the way to go. You can not only control the flavor profile and heat level, but can also grind them to a medium fine texture similar to Korean gochugaru, which is the classic main seasoning in this style of kimchi. This is where you can have fun with it. I love a base of Resham Patti chillies for their mild, red peppery-tomato-like flavor with a dose of Guntur Sannam for a little more heat, plus a generous amount of Sirārakhong Hāthei for more heat and intoxicating, smoky flavor and aroma. But, you can find your own perfect mix. Want a little more spice? Switch out the Guntur Sannam for whole Kashmiri chillies! Craving even more fire? Add in one Sivathei to the mix! Or, maybe you like it milder with a hint of smoke? Go for pretty much all Resham Patti with a little Sirārakhong Hāthei.

This kimchi recipe does not have fermented shrimp, dried anchovies, or fresh seafood in it. If you want that extra funk, I highly recommend Maangchi's recipe for Traditional Kimchi. Or, if you want to go the opposite direction and are looking for a vegan kimchi, Joanne Molinaro's My Favorite Kimchi recipe is my go-to. Both are linked below and would be bonkers delicious with the same ground Diaspora chilli mix from this recipe!

The great part about making kimchi is you can really eat it at any point in the fermentation process, but I love it the most after 2 to 3 days fermenting in a cool, dark place at room temperature and then about a week or two cold fermenting in the fridge. Though, my actual favorite moment of kimchi enjoyment is the last very funky bits of kimchi plus the juices made into a big, crispy-on-the-outside-a-little-custardy-on-the-inside kimchi pancake (though that happy bite is bittersweet because I know it is the end of my jar of kimchi!).

When developing this recipe, I referenced the following recipes and articles:
Serious Eats’ Baechu Kimchi (Napa Cabbage Kimchi) by Sunny Lee
The Korean Vegan’s My Favorite Kimchi by Joanne Molinaro
Traditional Kimchi by Maangchi
NYT Cooking’s Kimchi by Kelly Geary and Jessie Knadler, and adapted by Julia Moskin
Clean-Out-The-Fridge-Kimchi by Diana Yen
Seung Hee Lee’s “Kimchi easy” highlight on Instagram
 

Check boxes to add ingredients to cart

Ingredients

  • 1 large Napa cabbage (about 2¼ pounds total)
  • ⅓ cup, plus 1 tablespoon, kosher salt (I used Diamond Kosher, if using other salt, cut the quantity in half)
  • 1 large carrot, peeled and cut into matchsticks (about 6 ounces)
  • 2 to 3 watermelon radishes or 6 ounces white or purple daikon, cut into matchsticks
  • 4 (26g) whole Resham Patti Chillies
  • 10 (8g) whole Sirārakhong Hāthei Chillies
  • (6g) whole Guntur Sannam Chillies
  • ½ cup filtered water
  • One 2-inch piece dasima or kombu (optional)
  • 2 tablespoons sweet rice flour
  • 2 tablespoons fish sauce
  • 2 teaspoons soy sauce
  • 2 large cloves garlic, finely grated
  • ½-inch fresh ginger, peeled and finely grated
  • 4 ounces garlic chives or 6 scallions, cut into 1-inch pieces

Methods

  1. Cut the head of cabbage in half lengthwise and then cut each half into thirds, making sure some of the root end is attached to each piece. Rinse each cabbage wedge under cold water and then shake dry. Sprinkle ⅓ cup salt on the cabbage, making sure to get it between the leaves of each piece, place them in a large bowl and then add cold water until the cabbage is just barely covered. Place a large plate on top of the cabbage to keep them submerged and allow to sit for 4 to 6 hours.
  2. To prepare the chillies, break off the stems, and grind them, using a spice grinder, into a medium fine powder. (It should be about 5 tablespoons of ground chillies total.) Set aside.
  3. 1 hour before starting to assemble the kimchi, place the carrots and radishes in a medium bowl, sprinkle with the remaining 1 tablespoon salt, and massage into the vegetables. Let stand for 1 hour, then gently squeeze the vegetables, discarding all of the salty liquid that’s accumulated.
  4. About 40 minutes before starting to assemble the kimchi, make the kimchi seasoning paste. Place ½ cup water and daisima, if using, in a small saucepan over medium high heat and bring to a boil. Reduce the heat to medium and whisk in the sweet rice flour, stirring until it is smooth and thick with no lumps, about 1 minute. Remove from the heat, whisk in the reserved ground chillies, and allow to sit for 30 minutes. When cool, stir in the fish sauce, soy sauce, garlic, and ginger. Set aside.
  5. Drain the cabbage and carefully wring out each wedges, gently twisting it to release as much water as possible. Wipe out the large bowl to make sure it is dry and return the drained cabbage wedges to it. Add the reserved kimchi paste and, using your hands (disposable gloves are your friend here!), rub the paste all over the cabbage, making sure to get in between every single leaf. Add the drained, salted carrots and radishes, as well as the garlic chives or scallions, and mix well, massaging the vegetables to make sure the paste adheres to everything.
  6. To pack the kimchi, place one wedge in the bottom of a large, 2-quart jar, pressing it down. Top with some of the carrots and radishes, then another cabbage wedges, continuing to layer and press down until you finish with a cabbage wedge. Give everything one last press making sure as much air is out between the layers. You want about 2 inches at the top of the jar because the cabbage will start to release more liquid and expand as it ferments. Alternatively, you can use two quart jars to pack the kimchi.
  7. Place a lid on the kimchi and allow it to ferment at room temperature for 1 to 3 days. The time it takes to ferment will depend on the temperature as well as your own personal preferences. In the winter, it usually takes me about 2 to 3 days to get to the right level of funk because my apartment is cold, whereas in the summer it usually only takes 1 to 2 days. Each day, gently press down the kimchi to release some of the natural gasses and reseal the jar.
  8. After the kimchi has fermented at room temperature, transfer to the refrigerator and allow to cold ferment for 1 to 2 weeks before using. The kimchi will be good for many, many months, but will continue to ferment very slowly (I love the last of my super sour kimchi for stews and kimchi pancakes!).
     

Back In-Stock Notification

Add your email address below to receive an email as soon as this becomes available again.

We don't share your information with others.

SPEND MORE TO RECEIVE FREE SHIPPING
HOORAY! you get free shipping!

Cart empty.

You May Also Like:

The Diaspora Tote

The Diaspora Tote

Eid Card

Eid Card